Beginner fabric scrunchie
Use a small amount of fabric to practise sewing a tube, turning it right side out and threading elastic through a channel.
Beginner
Fabric tube · elastic · turning
1/4 in long seam
Test elastic before trimming
Cutting plan
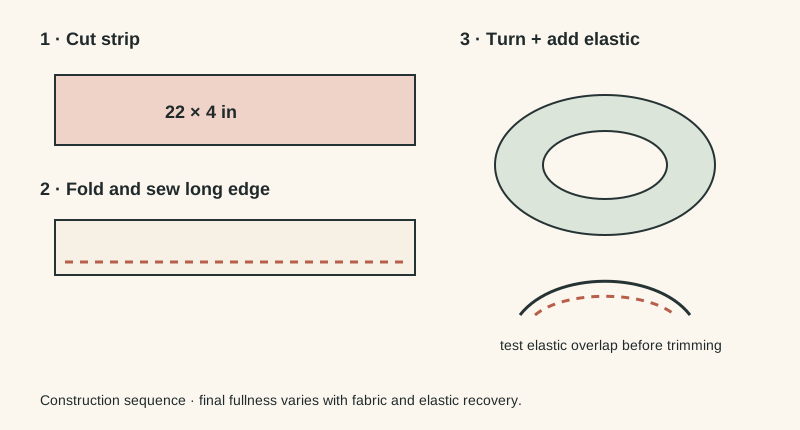
Cut one fabric strip 22 × 4 in. Cut a piece of 1/4 in elastic about 9 in long as a generous working length; do not treat that as a universal finished length. You will overlap and test the elastic before trimming because stretch and recovery vary by brand.
22 × 4 in
about 9 in to start; test fit
1. Make the fabric tube
Fold the strip in half lengthwise with right sides together, matching the long raw edges. Sew the long edge with a 1/4 in seam allowance. Leave both short ends open. A narrow seam keeps more room inside the finished tube, but accuracy matters more than speed.
2. Turn the tube right side out
Use a bodkin, loop turner or a blunt suitable tool to turn the tube. Avoid sharp tools that can pierce the fabric. Once turned, roll the seam gently between your fingers so it sits consistently along the tube rather than twisting around it.
3. Join the fabric ends
Bring the short ends of the fabric tube together right sides facing. Sew around as much of the short-end seam as you can comfortably reach, using about a 1/4 in allowance. This creates a fabric ring with a small opening left for the elastic. If your machine cannot comfortably handle the small opening, hand stitching is a sensible alternative.
4. Insert the elastic
Attach a safety pin or bodkin to one elastic end and feed it through the fabric ring. Secure the other end so it cannot disappear inside. Keep checking that the elastic itself has not twisted.
5. Test the gather before committing
Overlap the elastic ends temporarily and distribute the fabric around the ring. The goal is a useful gather with enough stretch for your intended hair arrangement—not a prescribed circumference. Adjust the overlap or shorten the elastic gradually. Remember that different elastics can feel very different even at the same length.
6. Secure and close
When satisfied, stitch the elastic overlap securely without sewing it to the fabric tube. Let the joined elastic retract inside. Fold the remaining fabric opening neatly and close it with small hand stitches or careful edge stitching.
What to learn from the first one
A scrunchie is small, but it exposes several useful handling skills: controlling a narrow seam, turning a tube, preventing elastic twists and closing an awkward opening. If the gather is too loose or too tight, record the elastic brand and finished overlap so the next version is an informed adjustment rather than a guess.
Before using special fabric
- Start with a stable woven fabric before trying slippery satin-like material.
- Test the elastic recovery by stretching it several times before sewing it in.
- Keep pins and safety pins accounted for during turning and threading.
- Make sure the elastic join is secure before closing the fabric opening.