Simple waist apron
Build confidence with longer hems and a simple waistband while making a useful project with no zipper or buttonholes.
Beginner+
Long hems · waistband · ties
1/2 in unless stated
Confirm tie length for wearer
Cutting plan
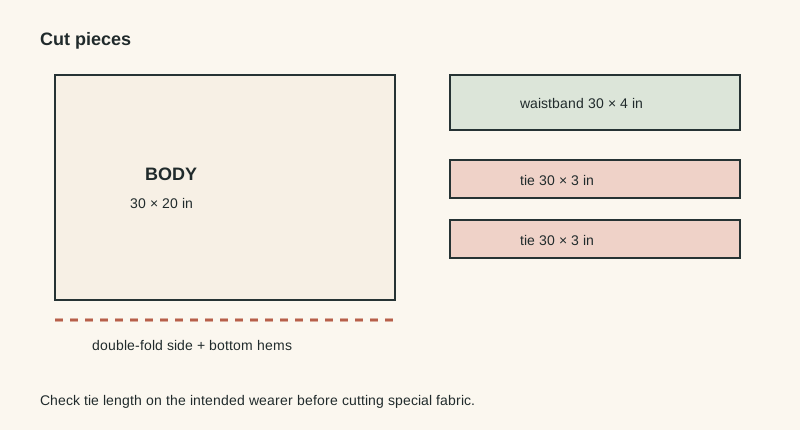
Cut a 30 × 20 in apron body, one 30 × 4 in waistband piece, and two 30 × 3 in tie strips. This creates a practical beginner-size waist apron with long ties, but body size and preferred wrapping differ: hold a tape measure around the intended wearer before cutting special fabric and lengthen the ties if needed.
30 × 20 in
30 × 4 in
30 × 3 in each
1. Hem the body sides and bottom
On both side edges and the bottom edge, press 1/2 in to the wrong side and then another 1/2 in. Stitch close to the inner folds. Leave the top raw for attachment to the waistband. After these hems, the body is approximately 28 in wide and 19 in high before the waistband is added.
2. Prepare the ties
Fold each tie strip in half lengthwise, right sides together, and sew the long edge at 1/2 in. Close one short end on each tie. Trim the closed-end corners carefully, turn the ties right side out and press. The open ends will be enclosed at the waistband.
3. Prepare the waistband
Press each short end of the 30 × 4 in waistband 1/2 in to the wrong side. Then press the waistband in half lengthwise, wrong sides together, to establish its center fold. Open it again and press each long raw edge 1/2 in toward the wrong side. You now have a band that can wrap around the apron body's raw top edge.
4. Position body and ties
Center the apron body along the waistband, inserting the raw top edge between the folded long edges. Insert each tie's open end into a waistband end by at least 1/2 in. Check that both ties point outward and are not twisted. Pin or clip the whole assembly.
5. Edge-stitch the waistband
Stitch around the waistband close to its folded edges, securing the apron body and tie ends inside. Reinforce where the ties meet the waistband because those points take more pulling force than the body hems.
6. Try it on and inspect
Tie the apron in a bow rather than a hard knot for easy removal. Check that the ties are long enough for the intended wearer without trailing excessively. If you plan to add a pocket later, place it while wearing the apron or pin a paper mock-up first; comfortable pocket position varies.
Why this project comes after the napkin
The individual operations are still mostly straight lines, but the pieces are longer and the waistband introduces alignment between several layers. It is good practice for keeping an even seam over distance and for understanding how one component can enclose the raw edge of another.
Before cutting valuable fabric
- Measure around the intended wearer to check that 30 in ties are appropriate.
- Use a stable washable woven for the easiest first version.
- Press the long folds accurately before assembly.
- Reinforce the tie attachment points and inspect them periodically in use.