Reusable fabric napkins
Practise accurate pressing, narrow hems and tidy corners on a forgiving square project you can repeat as a set.
Beginner
Pressing · hems · corners
1/2 in double-fold hems
Square the fabric first
Cutting plan
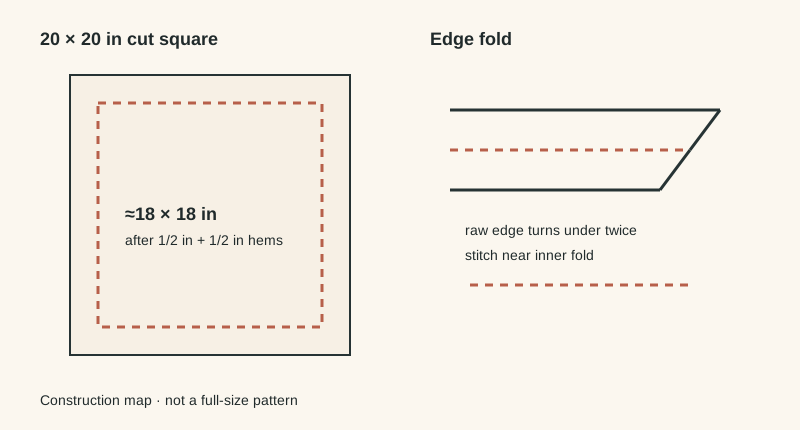
Cut one 20 × 20 in square for each napkin. The method below turns each raw edge under twice by 1/2 in. That uses 1 in of fabric at each side, so the checked target is an approximately 18 × 18 in finished napkin.
20 × 20 in per napkin
about 18 × 18 in
1. Start with a true square
Press the fabric before measuring. Check the grain and trim the piece square rather than assuming a shop-cut edge is perfectly straight. Stable cotton or linen-like woven fabric is easier to control than something slippery or stretchy.
2. Press the first fold
On one edge, press 1/2 in to the wrong side. Fold that edge over by another 1/2 in and press again. Repeat on all four sides. A seam gauge or ruler helps keep the hem depth consistent.
3. Manage the corners
Where the folded hems overlap, the corner becomes thicker. For a first version, keep the construction simple: open the second folds, trim only a tiny amount from the bulky raw corner if needed, then refold neatly. Do not cut into the final fold line. More advanced mitered corners can come later.
4. Stitch the hems
Starting away from a corner, sew close to the inner folded edge. Slow down before each corner. Stop with the needle down at the turning point if your machine and manual permit, raise the presser foot, pivot the fabric, lower the foot and continue. Keep your chosen distance from the fold consistent.
5. Press and measure
Press the completed napkin and check that opposite sides are similar in length and the corners lie reasonably flat. A handmade napkin does not need laboratory precision, but a visibly skewed square usually points to inaccurate cutting, stretching during sewing or uneven hems.
Why this is a useful first project
Repeating the same four edges makes small improvements easy to notice. The first napkin can be your practice piece; on the second, concentrate on even pressing; on the third, concentrate on corner control. That repetition teaches more than rushing into a complicated project.
Before cutting valuable fabric
- Prewash if the fabric is likely to shrink and the finished napkins will be laundered.
- Test your needle, thread and stitch length on a doubled scrap.
- Confirm the 18 in finished target suits your table and intended use.
- For directional prints, orient every square the same way before cutting a set.