Fabric coasters
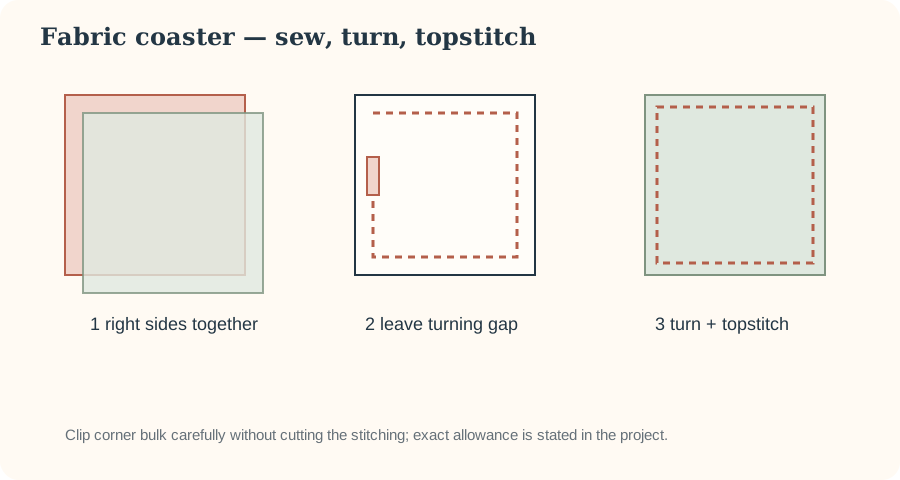
Make four simple fabric coasters while practising accurate squares, corners and topstitching.
Beginner
Straight seams · turning · topstitching
1/2 in unless stated
Prewash as appropriate
Cutting plan
For each coaster, cut two fabric squares and one lightweight batting/interfacing square at 5 × 5 in. With a 1/2 in seam allowance, the turned coaster is approximately 4 × 4 in before edge/topstitch effects.
8 × 5-in squares
4 × 5-in squares
1. Stack
Place fabric squares right sides together with batting against the wrong side of one fabric square. Pin or clip so layers do not shift.
2. Sew with an opening
Sew around the square using a 1/2 in seam allowance, leaving a 2–2.5 in opening along one side. Pivot at each corner with the needle down.
3. Reduce corner bulk and turn
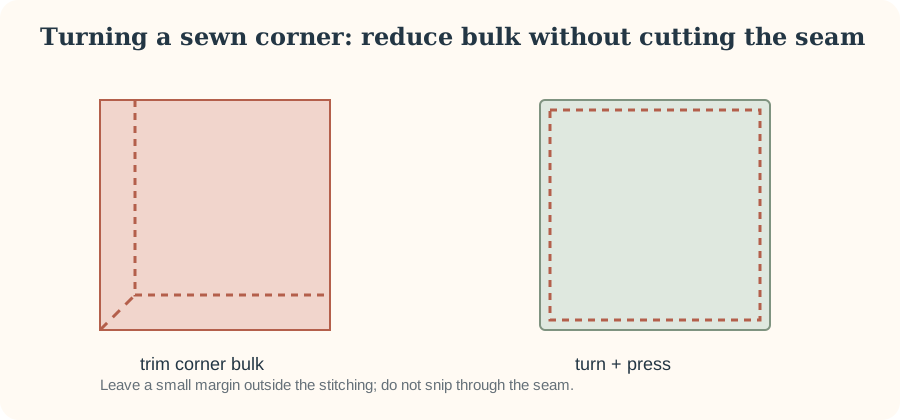
Trim corner bulk diagonally without cutting the stitching. Turn right side out, gently shape the corners and press the opening seam allowances inward.
4. Topstitch
Topstitch around the perimeter, which also closes the turning opening. Test the stitch length on a scrap containing the same layers.
Before cutting valuable fabric
- Confirm the measurements suit your intended use.
- Account for directional prints, nap and shrinkage.
- Test needle, thread, stitch length and seam allowance on scraps.
- Read the complete construction sequence once before starting.
Beginner construction notes
Coasters are small, but their size makes accuracy visible. They are good practice for consistent seam allowance, pivoting at corners, trimming bulk, turning and topstitching. Cut all pieces from the same template so errors do not multiply across the set.
Choose materials for the intended use
Stable woven cotton is straightforward to cut and sew. If adding batting or another absorbent/heat-resistant layer, use a material intended for the expected temperature and moisture exposure; ordinary craft batting should not automatically be treated as heat protection for very hot cookware.
Sew corners rather than rounding them accidentally
Approach each corner slowly, stop at the seam-allowance intersection with the needle positioned as your machine manual permits, lift the presser foot, pivot the fabric, lower the foot and continue. Consistent pivot points create a more square finished shape.
Leave and close the turning opening neatly
Backstitch at the ends of the opening if specified. After turning, tuck the raw edges inward so they continue the seam line rather than creating a dent. Press carefully before topstitching; the topstitching can then close the opening while giving the perimeter a consistent finish.
Trim bulk with restraint
Reducing corner bulk can help the piece turn cleanly, but leave enough fabric that the corner stitching remains secure. Do not cut through the seam. A blunt turning tool is safer than pushing hard with scissors or another sharp point.
Set checkpoint
Stack the finished coasters. Their outer dimensions, corner shape and topstitch distance should be reasonably consistent. If one differs, measure it and identify whether the error came from cutting, seam allowance or turning; that diagnosis is more useful than simply trimming the next piece smaller.