Envelope cushion cover
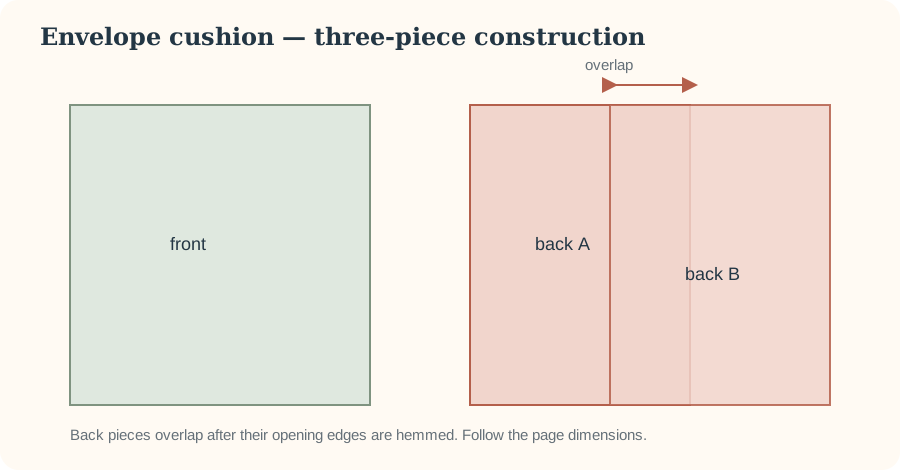
Make a simple 16-inch envelope cushion cover from three rectangles, with an overlapping back and no zipper.
Beginner
Straight seams · hems
1/2 in unless stated
Prewash as appropriate
Cutting plan
For a nominal 16 × 16 in finished cover using 1/2 in seam allowances, cut the front 17 × 17 in. Cut two back panels 17 × 12 in each. Each back panel receives a 1 in double-fold hem on its inner edge; the resulting overlap is generous enough for a beginner sample.
17 × 17 in
17 × 12 in each
1. Hem the back openings
On one 17-inch edge of each back piece, press 1/2 in to the wrong side, then another 1/2 in. Stitch close to the inner fold. The two hemmed edges will overlap at the centre back.
2. Assemble the cover
Place the front right side up. Put both backs right side down, aligning raw outer edges with the front and overlapping the hemmed edges. Pin or clip around the perimeter.
3. Sew and finish
Sew around all four sides with a 1/2 in seam allowance, pivoting at corners. Finish raw edges if the fabric frays. Clip corner bulk without cutting the stitching, turn through the envelope opening and press.
Before cutting valuable fabric
- Confirm the measurements suit your intended use.
- Account for directional prints, nap and shrinkage.
- Test needle, thread, stitch length and seam allowance on scraps.
- Read the complete construction sequence once before starting.
Beginner construction notes
An envelope cushion cover is mostly straight sewing, but the finished fit depends on two measurements: the actual cushion insert and the amount of back-panel overlap. Measure the insert rather than relying only on a product label, then verify the project's cutting calculation before cutting valuable fabric.
Choose fabric for the job
A stable woven home-dec fabric, cotton or linen blend is easier to square and press than a very stretchy or slippery material. If the fabric has a one-way print, mark the top of every panel so the design is not upside down on one half of the envelope.
Hem the overlapping edges first
The two back pieces need finished inner edges before they overlap. Press the hem accurately, stitch it evenly, then measure both pieces again. Unequal hems can make the overlap sit off-centre even when the outer edges align.
Assemble the overlap deliberately
Lay the front panel right side up, position the two back pieces right sides down with their finished edges overlapping, and verify the overall rectangle before pinning. The overlap should be large enough to cover the insert without gaping but not so large that inserting the cushion becomes unnecessarily difficult.
Control corners and bulk
Sew the stated seam allowance consistently around the perimeter. Before turning, trim corner bulk only as the instructions allow without cutting through the stitching. Turn gently and use a blunt point-turning tool rather than piercing the corner.
Fit checkpoint
Insert the cushion and inspect the front for squareness, the corners for fullness and the back for gaping. If the cover is too loose or tight, compare the sewn dimensions with the intended dimensions before changing the overlap; seam-allowance errors and insert measurements are separate variables.